Question: Have you ever finished a long night under the stars only to find the final file looks flat or strangely colored?
I’ve felt that sting. I’ll be blunt: a solid raw file matters more than any amount of rescuing in post. Focus, exposure, and the sky’s mood decide much of the outcome.
In this article, I’ll set realistic expectations. This isn’t a one-click cure. Sky conditions, sensor quirks, and taste shape the final image.
Think of the 7 tips as a full workflow: start in the field, get organized, build a clean base in Lightroom, fix color naturally, use local adjustments with restraint, control noise and sharpening, then finish in Photoshop or stack when needed.
Why this matters: Nightscapes and deep-sky projects need different paths. My goal is simple — a believable night sky, rich star detail, and an image that holds up on any screen. I’ve learned that subtle edits often win.
Table of Contents
Start With a Strong Raw File in the Field
A strong night capture begins before I touch a slider. I aim for a raw photo that gives me room in Lightroom and Photoshop later. That means enough signal in the foreground and midtones without blowing out the brighter sky.
Expose to preserve shadow detail without underexposing the sky
Don’t underexpose—lifting shadows at high ISO invites noise. I prefer to slightly protect sky highlights rather than crush the foreground. That trade keeps the image usable when I pull exposure and shadows later.


Focus is non-negotiable for sharp stars
Focus well. Soft stars ruin a nightscape faster than any bad white balance. Use live view, magnify a bright star, and lock focus. Sharpening cannot rescue an unsharp capture.
Real-world capture example and common settings
For a wide-field milky way landscape I often use a Nikon Z 7 with a Sigma 20mm f/1.4. Typical settings: ISO 8000, f/1.6, 25 seconds. Those settings balance star signal and foreground exposure on many cameras and nights.
Remember: temperature, light pollution, and moon phase change what works. There are no perfect settings, only right choices for the night. The best edit usually begins out there—getting the raw photo right saves time and keeps your final image honest.
Set Up a Clean Editing Workflow and Choose Your Software
Clean files and a predictable process let me focus on creativity, not chaos. I start by picking the right software for each job and then pruning my shoot so I don’t waste time on weak photos.
Lightroom Classic and Adobe Camera Raw handle raw development nearly identically for night work. Use either for core exposure, white balance, and base noise reduction. It’s mostly a workflow preference, not a quality gap.
Where Photoshop fits
Photoshop earns its keep when I need star reduction, complex composites, or final cleanup that the develop panel can’t do cleanly. For deep tweaks, I move an edited TIFF into photoshop and finish there.
Organize before you edit
I always cull favorites first. That protects my time and stops me from polishing files that won’t hold up.
- Folder structure for deep-sky: target-name → date → light / dark / flat / bias.
- Bits and export: keep stacked TIFFs in 16‑bit (or 32‑bit HDR when needed) for safer adjustments.
- Tools: Adobe Bridge and DeepSkyStacker help with large image sets and stacking steps.
Set a clear sequence: organize, cull, global edits, then local adjustments. When the base is solid, later steps feel faster and more intentional.
📚 Read Next
Shoot it Right First: The best editing cannot fix a blurry photo. Make sure your capture is flawless by revisiting How Do I Set Up a DSLR to Take Photos of the Stars?
Upgrade Your Glass: If your images are still too noisy after post-processing, it might be your equipment. Check out the Best Lenses for Astrophotography.
Software Authority: According to Adobe, shooting in RAW format is absolutely non-negotiable if you want to recover shadow details in the night sky during editing.
How to Edit Astrophotography in Lightroom Using Global Sliders
Begin with lens corrections. I enable profile correction and remove chromatic aberration first. That simple step cleans bright stars and fixes vignetting without touching a slider.
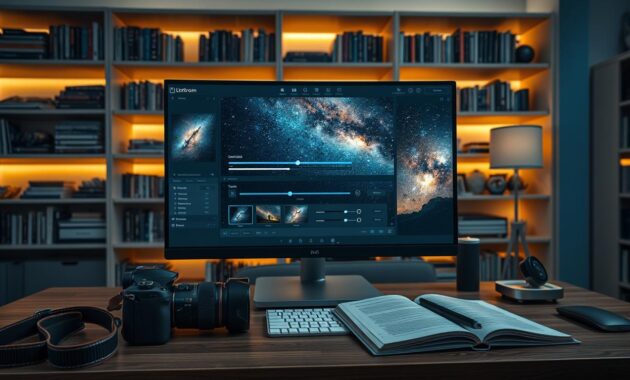
Shape exposure carefully
I nudge exposure, highlights, whites, shadows, and blacks with noise in mind. Example values I use for a Milky Way shot: Temp 4200 / Tint +28; Exposure -1.06; Contrast +12; Highlights +7; Whites +40.
Use presence tools sparingly
Texture, clarity, and dehaze make the Milky Way pop fast. I keep global clarity under ~15 and apply dehaze locally when needed. Too much creates crunchy stars and halos.
Tone Curve for natural contrast
A gentle curve adds depth without HDR. I set two anchors: Input 188 → Output 180 and Input 93 → Output 75. That shapes contrast while keeping the sky believable.
Next step: get white balance and color right so the night feels real, not processed.
| Step | Action | Why it matters |
|---|---|---|
| 1 | Enable profile correction & remove CA | Fixes distortion, removes color fringing on stars |
| 2 | Adjust exposure & whites | Reveal Milky Way detail without boosting noise |
| 3 | Fine-tune Texture/Clarity/Dehaze | Enhances structure; avoid overuse that makes stars crunchy |
| 4 | Apply gentle Tone Curve anchors | Shapes contrast for a natural night look |
White Balance and Color That Looks Like a Real Night Sky
Getting the white balance right makes a night image feel honest. I aim for a believable sky that still feels magical, not a trendy purple cast.
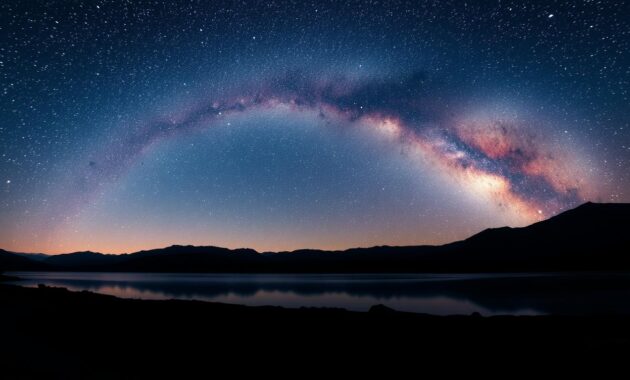
Temperature and Tint are my main tools for neutralizing light pollution, airglow, twilight glow, and moonlit haze. I start with rough numbers, then trust the eye.
Practical temperature ranges
Under very dark skies I usually land between 4000K and 4500K. With heavy light pollution I move toward ~3500K. These are starting points, not rules.
Color controls I use next
- I avoid Tungsten as a default; it often overblues the sky.
- I prefer HSL and a low Vibrance (often under 15) over global saturation.
- Be cautious with Tint—pushing purple can hide green airglow and produce an unnatural look.
Honestly, I don’t fret over in-camera settings when I shoot raw. White balance is flexible in post, and careful editing keeps the final photo honest. Once the global color feels right, local adjustments make the Milky Way pop without screaming.
Local Adjustments That Make the Milky Way Pop
Local tweaks let me guide the eye without undoing a careful global base. I always finish global work first, then sculpt attention with targeted edits. That order keeps exposure and color stable before I push detail.
Graduated filters are my first stop. I use them to balance the sky and foreground exposure without brightening everything. A typical foreground filter: Temp -14, Tint +4, Exposure +0.67; then soften with Texture -4, Clarity -14, Dehaze -14, Saturation -11, Noise +25. That keeps the foreground readable yet night-like.
Targeted Milky Way boosts
I then use Select Sky and a brush across the band. Example Milky Way settings: Exposure -0.67, Highlights +24, Whites +15, Clarity +9, Dehaze +10, Noise +16. Apply these only where structure exists, not the entire sky.
Realism and limits
Quick realism check: if the foreground starts reading like dusk or daytime, dial it back. Brightening dark areas reveals noise fast, and heavy clarity invites crunchy stars.
| Area | Common Setting | Why |
|---|---|---|
| Foreground | Temp -14, Exposure +0.67, Noise 25 | Readable detail without daytime look |
| Milky Way | Highlights +24, Clarity +9, Noise 16 | Structure pop with controlled noise |
| Sky edges | Low Dehaze, -5 to +5 | Avoid halos and preserve stars |
Note: every local pop costs noise and sharpening work. The next section covers that tradeoff and how I pay it wisely.
Noise Reduction and Sharpening Without Turning Stars Crunchy
Sharp detail starts with restraint, especially when noise threatens the sky.
I use Lightroom’s Detail panel like a chef uses a spice rack: measured and intentional. First, I decide whether luminance or color noise is the real problem. Luminance looks like grainy texture; color shows as blotchy red/green/blue speckles.
Detail panel essentials: luminance vs color noise reduction
Color noise reduction removes ugly speckles but can wash out tiny star hues. I keep color NR below ~60 and often nearer 20–40. For luminance I start low—Luminance 15 keeps texture without making the sky milky.
Use the Masking slider to avoid sharpening noise in dark areas
Hold Alt/Option while dragging Masking to preview where sharpening applies. That preview stops you sharpening empty sky and amplifying noise. For many Milky Way shots a high mask (around ~90) shields dark areas and targets edges.
When adding sharpening creates more problems than detail
Moderate sharpening is safer than aggressive settings. If sharpening shows more noise than structure, stop. Revisit exposure, blacks, and local contrast before increasing sharpness.
| Control | Example Value | Why it works |
|---|---|---|
| Sharpening Amount | 50 | Clear stars without oversharpening |
| Radius | 1.2 | Focuses edge work on stars |
| Luminance NR | 15 | Calms grain, preserves detail |
| Detail (NR) | 45 | Keeps star shapes intact |
- Rule: treat noise reduction like seasoning—stop when the sky looks natural, not plastic.
- Watch shadows: pulling shadows makes noise louder; fix exposure first, then apply reduction.
- Crunchy stars: too much clarity or dehaze plus heavy sharpening equals harsh, bloated stars—pull back and reassess.
Advanced Finishing in Photoshop and Stacking for Cleaner Images
If stars look bloated after development, Photoshop becomes my surgical tool. I leave Lightroom when global sliders can’t clean star shapes or when a stacked file needs deeper tonal work.
Simple star reduction workflow
My quick steps: duplicate the layer, Select > Color Range (sample a bright star), refine fuzziness, then Select > Modify > Feather (1 px).
Finally use Filter > Other > Minimum with Preserve Roundness at ~0.5 radius. The result should be subtle—clean round stars, not hollow pins.
When to avoid heavy reduction
Avoid aggressive star work on photos shot with diffusion filters or when star shapes turn into odd pixels. Heavy reduction kills realism.
Stacking and support frames
Stacking raises signal-to-noise: capture many light frames and include darks, flats, and bias. Match darks by exposure and temperature; 10–15 is common.
DeepSkyStacker → Photoshop pipeline
In DeepSkyStacker register and stack lights with support frames. Open the 32-bit Autosave.tif in Photoshop, crop stacking edges, remove gradients, then use Levels without clipping.
Convert 32-bit to 16-bit, then use Curves to shape contrast carefully. Small, deliberate moves keep the image honest and clean.
| Task | Example value | Why |
|---|---|---|
| Minimum radius | 0.5 | Preserves roundness |
| Darks | 10–15 frames | Reduce thermal noise |
| Output | 32‑bit then 16‑bit | Safer toning then editing |
Conclusion
The quiet truth: the best night images look like the scene itself—only clearer.
I keep a simple sequence in mind: capture a strong raw file, build a clean base, fix lens quirks, shape tones, nail white balance, and make local edits with restraint. Then use stacking or Photoshop for final polish when signal or star shape needs work.
Every image is different. That’s the craft, not a setback. Build instincts, not a list of fixed numbers, and use a short checklist so editing takes less time and feels less personal after a tough shoot.
Practical nudge: save versions as you go. Compare before/after steps and you’ll learn faster than guessing next time. If your first attempts looked rough, you’re normal—consistency made the difference for me.
FAQ
What camera settings give the cleanest RAW file for Milky Way landscapes?
Which software should I use first: Lightroom Classic, Adobe Camera Raw, or Photoshop?
How far should I push Exposure, Shadows, and Blacks in the initial edit?
When should I use Texture, Clarity, and Dehaze on the sky?
How do I set white balance so the sky looks real under light pollution or moonlight?
What local adjustments make the foreground and sky balance naturally?
How do I reduce noise without turning stars crunchy?
When should I stack frames, and which support frames matter?
What Photoshop finishing moves help a nightscape without overprocessing?
How do I fix bloated stars created during aggressive edits?
What are the typical sharpening and masking settings for night images?
Can I rely solely on Lightroom for noise reduction and stacking?
How much color saturation is healthy for the Milky Way without looking fake?
What lens corrections matter for night sky photos?
Any quick workflow tips for organizing and selecting frames before editing?

I’m Rodrigo Durães, founder of CareersForge — the world’s leading career platform — and recognized as one of the most comprehensive and experienced career and life coaches globally. With multiple academic degrees from the world’s top universities and over two decades of experience as a CEO, my mission is clear: to help people unlock their full professional potential through honest, strategic, and proven content.